การติดตั้ง Docker บน CentOS 7
เมื่อพูดถึง Docker ผมไม่อธิบายนะครับว่ามันคืออะไร มีที่เขาเขียนอธิบายไว้มากมายแล้ว ผมขอพูดถึงการติดตั้ง Docker บน CentOS 7 เลยนะครับ การติดตั้งมีอยู่ 2 วิธี
วิธีที่ 1 ติดตั้งโดยใช้คำสั่ง yum
เพิ่มแหล่งดาวน์โหลดใน /etc/yum.repos.d โดยการสร้างไฟล์ชื่อ docker.repo ซึ่งมีเนื้อความข้างในดังนี้
[docker-main-repo]
name=Docker main Repository
baseurl=https://yum.dockerproject.org/repo/main/centos/7
enabled=1
gpgcheck=1
gpgkey=https://yum.dockerproject.org/gpg
แล้วติดตั้งด้วยคำสั่ง
[root@docker-test ~]# yum install docker-engine
วิธีที่ 2 ใช้คำสั่ง curl
[root@docker-test ~]# curl -fsSL https://get.docker.com/ | sh
+ sh -c 'sleep 3; yum -y -q install docker-engine'
warning: /var/cache/yum/x86_64/7/docker-main-repo/packages/docker-engine-selinux-1.12.3-1.el7.centos.noarch.rpm: Header V4 RSA/SHA512 Signature, key ID 2c52609d: NOKEY
Public key for docker-engine-selinux-1.12.3-1.el7.centos.noarch.rpm is not installed
Importing GPG key 0x2C52609D:
 Userid     : "Docker Release Tool (releasedocker) <docker@docker.com>"
 Fingerprint: 5811 8e89 f3a9 1289 7c07 0adb f762 2157 2c52 609d
 From       : https://yum.dockerproject.org/gpg
setsebool:  SELinux is disabled.

If you would like to use Docker as a non-root user, you should now consider
adding your user to the "docker" group with something like:

  sudo usermod -aG docker your-user

Remember that you will have to log out and back in for this to take effect!
แค่พิมพ์ curl -fsSL https://get.docker.com/ | sh มันก็จะติดตั้ง Docker ให้เราเองเรียบร้อยครับ
หลังจากนั้นก็สั่งให้ docker ทำงานทุกครั้งที่เปิดเครื่อง
[root@docker-test ~]# systemctl enable docker.service
สั่งให้ docker ทำงานเลย
[root@docker-test ~]# systemctl start docker.service
คำสั่งแรก อยากรู้ว่า docker เวอร์ชันอะไร
[root@docker-test ~]# docker version
Client:
 Version:      1.12.3
 API version:  1.24
 Go version:   go1.6.3
 Git commit:   6b644ec
 Built:
 OS/Arch:      linux/amd64

Server:
 Version:      1.12.3
 API version:  1.24
 Go version:   go1.6.3
 Git commit:   6b644ec
 Built:
 OS/Arch:      linux/amd64
อยากรู้ว่าติดตั้งเสร็จแล้วมี image อะไรบ้าง ผลที่ได้คือ ไม่มี image อะไรเลย เพราะยังไม่ได้ดาวน์โหลดมา
[root@docker-test ~]# docker images
REPOSITORY          TAG                 IMAGE ID            CREATED             SIZE
[root@docker-test ~]#
เขียนโปรแกรมทั่วไป ก็มี hello world เพราะฉะนั้น docker ก็มี image hello-world
[root@docker-test ~]# docker search hello
NAME                               DESCRIPTION                                     STARS     OFFICIAL   AUTOMATED
hello-world                        Hello World! (an example of minimal Docker...   206       [OK]
tutum/hello-world                  Image to test docker deployments. Has Apac...   28                   [OK]
...
ค้นหาเจอก็ดาวน์โหลดมาติดตั้งกันเลย
[root@docker-test ~]# docker pull hello-world
Using default tag: latest
latest: Pulling from library/hello-world
c04b14da8d14: Pull complete
Digest: sha256:0256e8a36e2070f7bf2d0b0763dbabdd67798512411de4cdcf9431a1feb60fd9
Status: Downloaded newer image for hello-world:latest
ลองถามดูอีกทีซิว่ามี image อะไรบ้าง
[root@docker-test ~]# docker images
REPOSITORY          TAG                 IMAGE ID            CREATED             SIZE
hello-world         latest              c54a2cc56cbb        4 months ago        1.848 kB
มีแล้วๆ มี image ชื่อ hello-world
เวลาเราจะรัน เราเรียกว่ารัน hello-world container
ซึ่งผลที่ได้จากการรันเป็นดังนี้
[root@docker-test ~]# docker run hello-world

Hello from Docker!
This message shows that your installation appears to be working correctly.

To generate this message, Docker took the following steps:
 1. The Docker client contacted the Docker daemon.
 2. The Docker daemon pulled the "hello-world" image from the Docker Hub.
 3. The Docker daemon created a new container from that image which runs the
    executable that produces the output you are currently reading.
 4. The Docker daemon streamed that output to the Docker client, which sent it
    to your terminal.

To try something more ambitious, you can run an Ubuntu container with:
 $ docker run -it ubuntu bash

Share images, automate workflows, and more with a free Docker Hub account:
 https://hub.docker.com

For more examples and ideas, visit:
 https://docs.docker.com/engine/userguide/
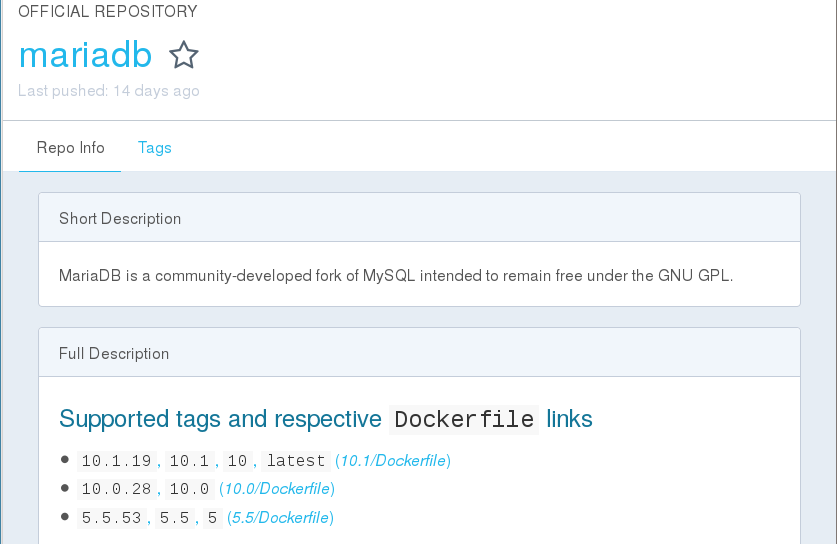
แต่ความเป็นจริงแล้ว image มีให้เราดาวน์โหลดมากมาย ไม่ว่าจะเป็นลีนุกซ์ดิสตริบิวชั่นต่างๆ เช่น CentOS Debian Ubuntu หรือจะเป็นฐานข้อมูล PostgreSQL, MySQL, MariaDB หรือจะเป็น PHP เวอร์ชันต่างๆ และอื่นๆ อีกมากมายครับ ที่เราสามารถดาวน์โหลด image แล้วรัน container ขึ้นมาใช้งานได้ image เหล่านั้นเราจะค้นหาได้จากที่ไหน จากเว็บนี้ครับ https://hub.docker.com/ มีคนทำมาให้ พร้อมให้เราใช้งาน เช่น ผมค้นหา MariaDB (เช่นเดียวกันกับใช้คำสั่ง docker search mariadb)
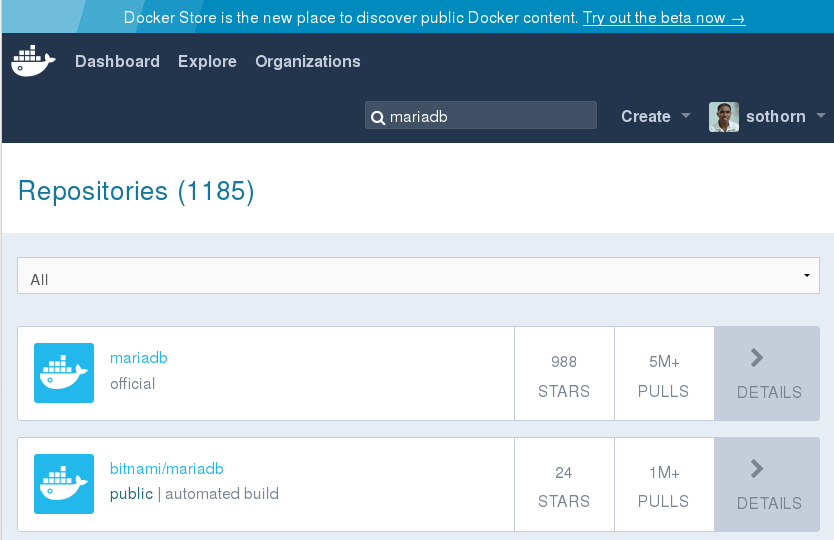
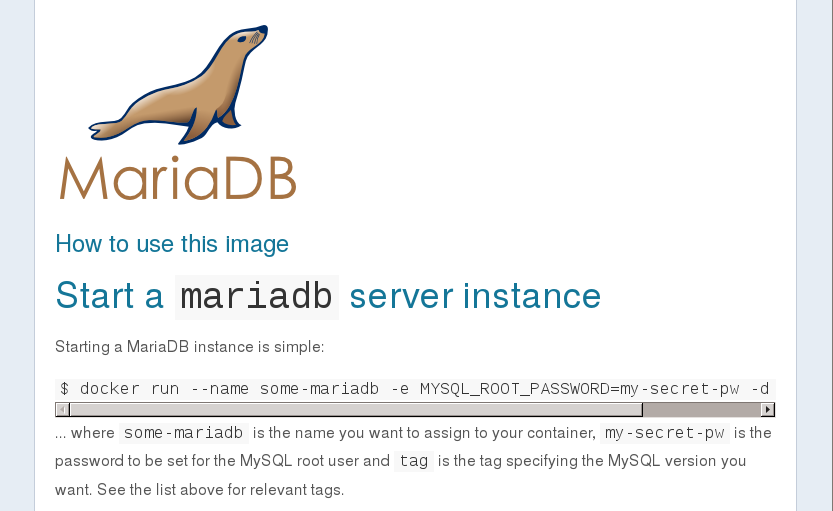
แต่ในการค้นหาผ่านเว็บนั้นเราสามารถ ดูรายละเอียดรวมถึงวิธีการใช้งาน container นั้นๆด้วย
สำหรับเรื่องนี้ก็คิดว่าคงติดตั้ง docker กันได้ และพอที่จะดาวน์โหลด image ( pull image) กันได้นะครับ
สำหรับคนที่ไม่อยากใช้งาน docker ด้วย user root ก็สามารถให้ user ทั่วไปที่มีอยู่แล้วในระบบสามารถใช้งาน docker ได้ ก็สามารถทำได้ด้วยคำสั่งนี้ครับ
[root@docker-test ~]# usermod -aG docker user(ที่ต้องการ)
อ้างอิง :
- https://docs.docker.com/engine/installation/linux/centos/
- https://www.digitalocean.com/community/tutorials/how-to-install-and-use-docker-on-centos-7
![]()